Is Fixing a Cracked iPhone Screen at Home a Good Idea?
A cracked iPhone screen is a frustrating experience. It not only mars the aesthetic appeal of your device but also hinders functionality and can even pose a safety risk. While professional repair services are readily available, the cost can be significant, leading many to consider fixing the screen themselves. But is it really a good idea to attempt an iPhone screen repair at home? The answer is complex and depends on several factors.
On one hand, DIY iPhone screen repair can save you money. Replacement screens and repair kits are often cheaper than professional services. Furthermore, you have the satisfaction of fixing the device yourself. However, it's important to acknowledge the risks involved. iPhones are complex devices, and improper handling can lead to further damage, potentially voiding your warranty or even rendering the phone unusable. The difficulty of the repair also varies depending on the iPhone model; newer models tend to be more challenging to disassemble and reassemble.
Before you decide to embark on this journey, carefully weigh the pros and cons. Consider your technical skills, the availability of reliable repair guides, and your comfort level with potentially damaging your device. If you're unsure, seeking professional help might be the wiser choice.
Assessing the Damage and Gathering Supplies
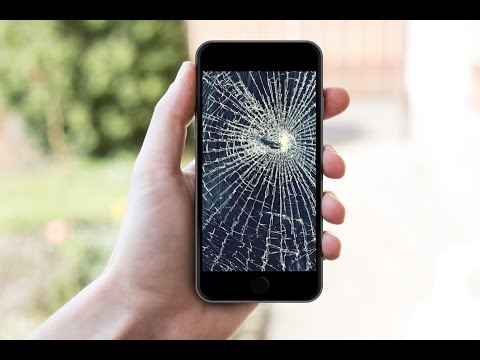
Before you even think about ordering parts, take a close look at the damage to your iPhone screen. Is it just a minor crack, or is the screen shattered? Is the touch screen still responsive, or is it completely dead? The extent of the damage will influence the complexity of the repair and the specific tools and parts you'll need.
Identifying the Correct Replacement Screen
This is a crucial step. You need to ensure you're ordering the correct replacement screen for your specific iPhone model. Using the wrong screen can lead to compatibility issues and prevent your phone from working correctly. Check your iPhone's model number (found in Settings > General > About) and use that to identify the correct replacement screen. Reputable online retailers typically offer screens specifically designed for each iPhone model. Pay attention to the quality of the screen; opting for a cheaper, lower-quality screen might compromise the display's brightness, color accuracy, and touch sensitivity.
Essential Tools and Materials
Here's a list of essential tools and materials you'll need for a successful iPhone screen repair:
- Replacement Screen: As mentioned above, make sure it's the correct model and of good quality.
- Pentalobe Screwdriver: These are the tiny, five-pointed screws located at the bottom of the iPhone.
- Phillips Head Screwdriver: Used for various screws inside the iPhone.
- Spudger or Plastic Opening Tool: For gently prying open the iPhone without damaging the internal components.
- Suction Cup: To help lift the screen.
- Heat Gun or Hair Dryer: To soften the adhesive that holds the screen in place. Use cautiously and avoid overheating.
- Tweezers: For handling small parts and connectors.
- Isopropyl Alcohol (90% or higher): To clean adhesive residue.
- Repair Mat: To organize screws and small parts and prevent them from getting lost.
- Wrist Strap (Anti-Static): To prevent electrostatic discharge, which can damage sensitive electronic components.
- Adhesive Strips: To re-seal the iPhone after the repair.
You can often purchase these tools as part of an iPhone screen repair kit. Make sure the kit includes all the necessary tools for your specific iPhone model.
Step-by-Step Guide to iPhone Screen Replacement
Disclaimer: The following steps are a general guide. The specific process may vary slightly depending on your iPhone model. Always refer to a reliable video tutorial specifically for your iPhone model before starting the repair.
1. Power Off Your iPhone
This is the most important first step. Always power off your iPhone completely before starting any repair to prevent electrical damage.
2. Remove the Pentalobe Screws
Using the pentalobe screwdriver, carefully remove the two screws located at the bottom of the iPhone, near the charging port. Store these screws in a safe place, as they are easily lost.
3. Apply Heat to Loosen the Adhesive
Use a heat gun or hair dryer on a low setting to gently heat the edges of the iPhone screen. This will soften the adhesive that holds the screen in place. Be careful not to overheat the phone, as this can damage the internal components. Focus on heating the edges of the screen evenly.
4. Use the Suction Cup and Spudger to Open the iPhone
Attach the suction cup to the screen near the bottom edge. Gently pull up on the suction cup while simultaneously inserting the spudger or plastic opening tool into the small gap between the screen and the frame. Carefully slide the spudger around the edges of the iPhone to loosen the adhesive. Be patient and avoid using excessive force, as this can damage the screen or the frame. The goal is to create a small opening along the edges.
5. Open the iPhone Like a Book
Once you've loosened the adhesive, carefully open the iPhone like a book, hinging it from the top. Be extremely cautious, as the screen is still connected to the logic board by delicate cables. Do not open the screen more than 90 degrees, as this can strain or tear the cables.
6. Disconnect the Battery
Before disconnecting any other cables, disconnect the battery. This is a crucial safety precaution. Locate the metal bracket that covers the battery connector on the logic board. Remove the screws holding the bracket in place (usually Phillips head). Carefully remove the bracket and then use the spudger to gently pry up the battery connector from the logic board.
7. Disconnect the Screen Cables
Locate the metal bracket that covers the screen connectors on the logic board. Remove the screws holding the bracket in place and carefully remove the bracket. Use the spudger to gently pry up the screen connectors from the logic board. Be very careful not to damage the connectors or the surrounding components.
8. Remove the Old Screen
The old screen should now be completely detached from the iPhone. Carefully remove it and set it aside.
9. Transfer Components to the New Screen (If Necessary)
Some replacement screens may not come with all the necessary components, such as the front-facing camera, earpiece speaker, or proximity sensor. If necessary, carefully transfer these components from the old screen to the new screen. Use the heat gun and spudger to gently loosen the adhesive holding these components in place. Be extremely careful not to damage these components during the transfer.
10. Connect the New Screen Cables
Carefully connect the screen cables to the logic board. Make sure the connectors are properly aligned and securely seated. Replace the metal bracket over the screen connectors and secure it with the screws.
11. Reconnect the Battery
Reconnect the battery connector to the logic board. Replace the metal bracket over the battery connector and secure it with the screws.
12. Test the New Screen
Before sealing the iPhone, power it on to test the new screen. Check if the display is working correctly, the touch screen is responsive, and all the features are functioning properly. If everything is working as expected, power off the iPhone again.
13. Reassemble the iPhone
Carefully close the iPhone like a book, hinging it from the top. Make sure the screen is properly aligned with the frame. Apply new adhesive strips around the edges of the screen to seal it. Press firmly around the edges of the screen to ensure a good seal.
14. Reinstall the Pentalobe Screws
Reinstall the two pentalobe screws at the bottom of the iPhone. Make sure they are properly tightened.
Post-Repair Tips and Considerations
After successfully repairing your iPhone screen, here are a few tips and considerations to keep in mind:
- Screen Protector: Invest in a high-quality screen protector to prevent future scratches and cracks.
- Protective Case: Use a protective case to provide additional protection for your iPhone.
- Avoid Extreme Temperatures: Avoid exposing your iPhone to extreme temperatures, as this can damage the screen and other components.
- Handle with Care: Be mindful of how you handle your iPhone to prevent accidental drops and impacts.
- Professional Inspection: If you experience any issues with your iPhone after the repair, consider taking it to a professional repair service for inspection.
Fixing a cracked iPhone screen at home can be a rewarding experience, but it's not without its risks. By carefully assessing the damage, gathering the necessary supplies, and following a reliable repair guide, you can increase your chances of success. However, if you're unsure or uncomfortable with any part of the process, seeking professional help is always the safest option.
0 Komentar